
So, off to Michaels I went to wander the aisles. I was probably there for over an hour. That place just inspires me and gets my creative juices flowin. I probably changed my mind no less than ten times trying to figure our exactly how I would execute my plan, but I finally came home with these supplies is hand:
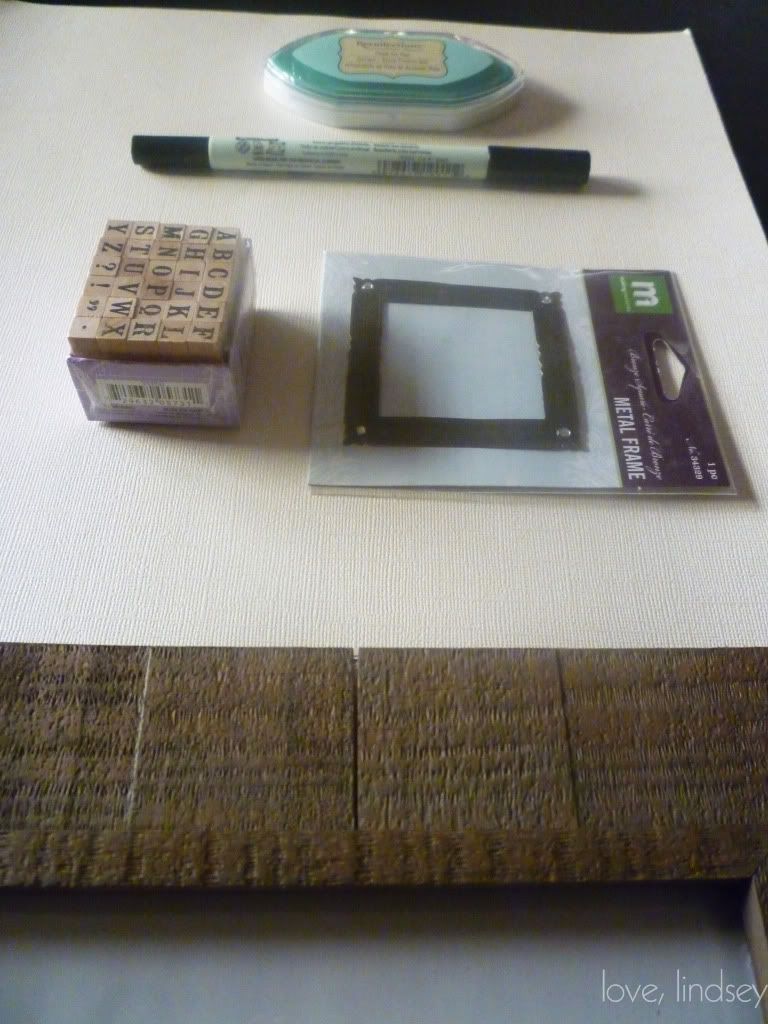
A quality black pen, acid free paper (I got two pieces knowing I'd probably mess the first one up), a rustic wood frame, a tiny open metal frame (found among scrapbook supplies), some aqua stamp ink and some letter stamps (I actually already had those at home) from the dollar bin. Frame included, I got all of the supplies for less than $20, thanks to items being on sale and 40 % off coupons.
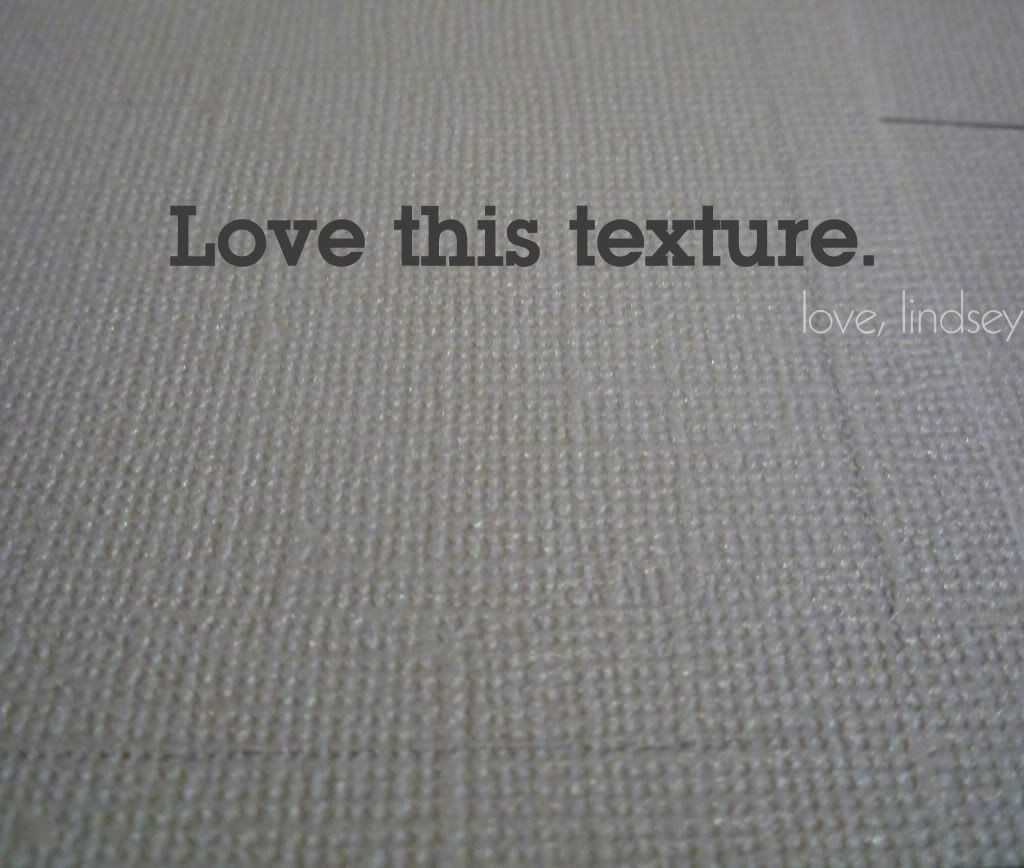
How great is this ivory paper? It has a little bit of a sheen to it and some great texture.
Even if you're not interested in writing out wedding vows, you could easily translate this project to write out a favorite poem, saying, bible verse or song lyrics.
I started by cutting the paper to the size of my frame. My frame happened to be 8x10. Then, I put the paper in the frame without the glass on it, flipped it over so the front side was showing and lightly traced around the edge so I would know where I needed my writing to stop and still be visible in the frame. Then, I positioned the metal frame where I wanted it on the paper and lightly traced around the edge.
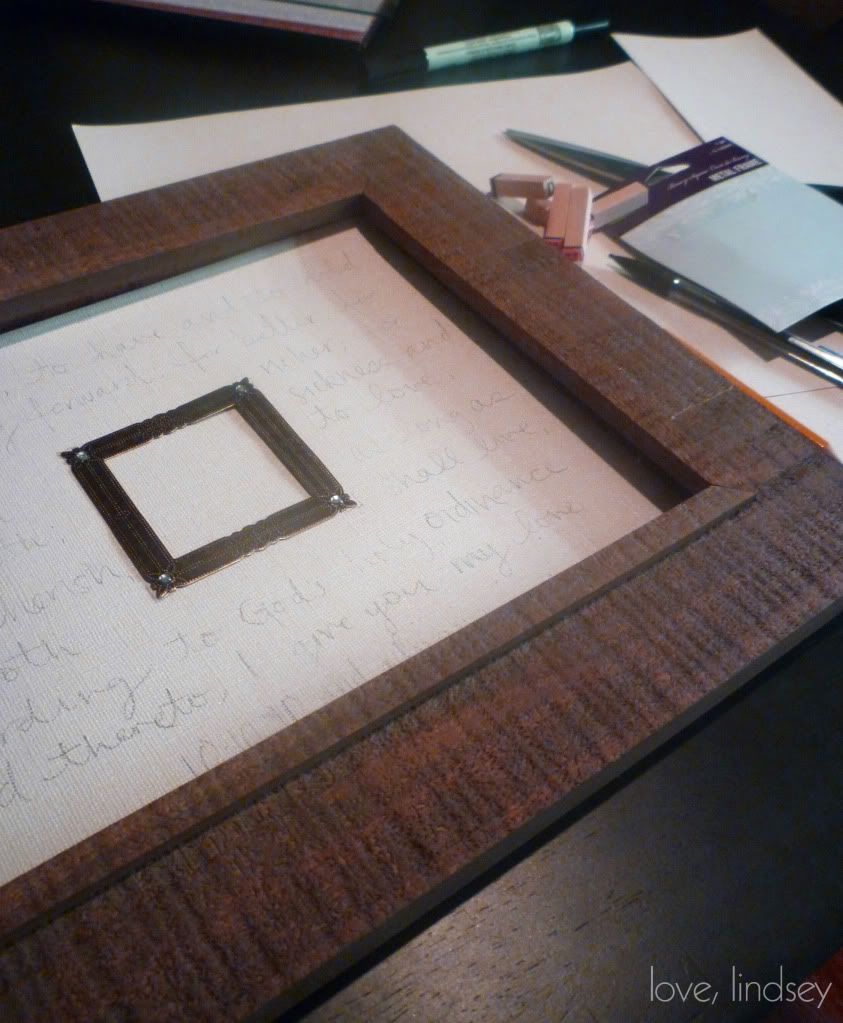
Next, I got to it and started lightly writing in pencil. If you need to, use a straight edge as your guide for the lettering. Once you have the spacing right, trace over the pencil with the black marker. If any pencil marks are visible, you'll want to erase those.
For me, there isn't really an exact science to getting the spacing on the lettering right. I just kind of eyeball it. And honestly, sometimes I eyeball it wrong. As predicted with my two piece of paper purchase, I messed up the first time. And I didn't realize it looked wrong until AFTER I wrote in ink. Oh, well.
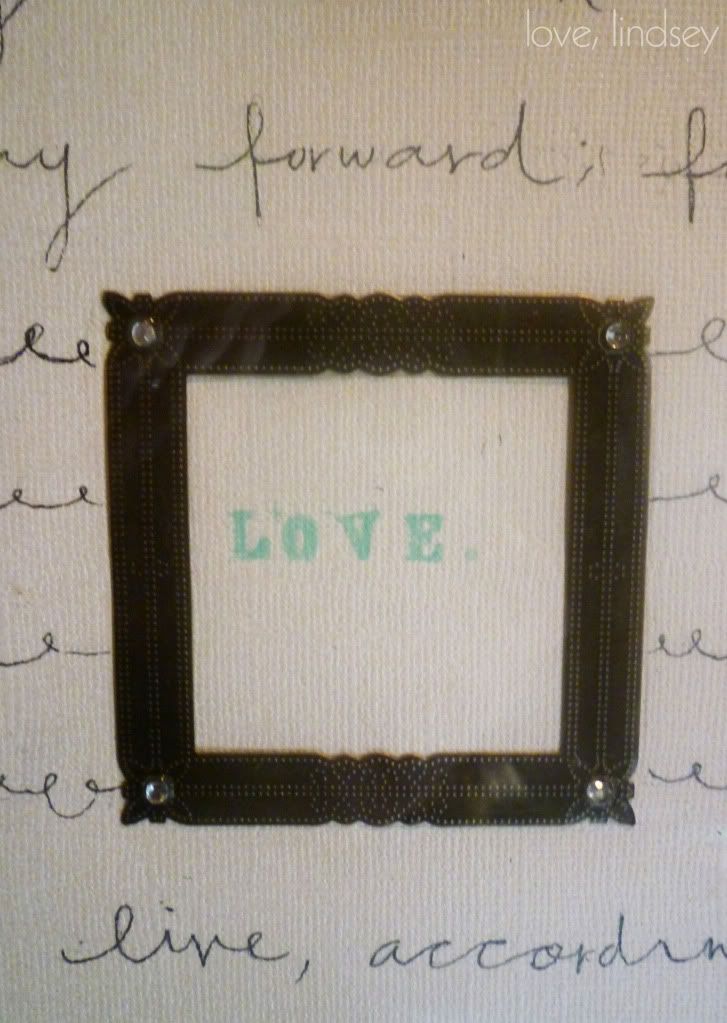
Once the writing was complete, I positioned the metal frame and secured it on with glue dots. Then, I used the alphabet stamps to stamp "love." You could really pick any word, just make sure it's short enough to fit. The stamping will NOT be perfect, but just go with it. It's that slight handmade imperfection that makes this piece so special.
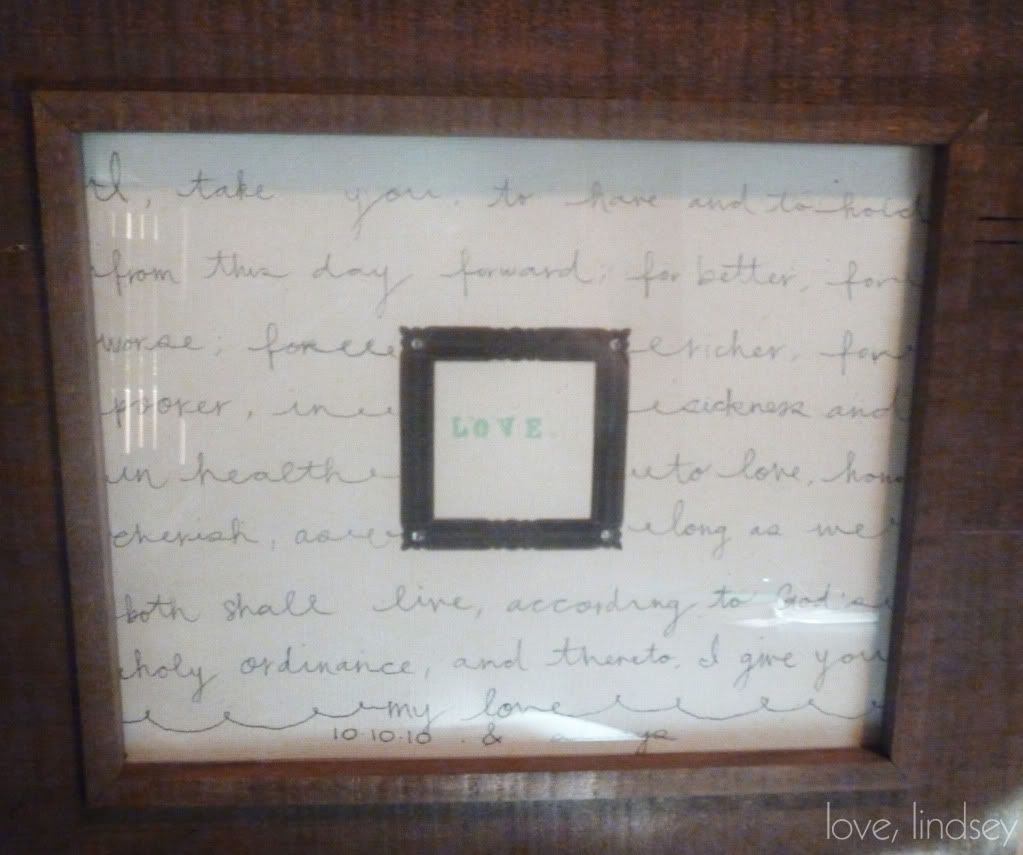
Once you have everything right, but the frame back together, step back and admire your handiwork. You're done! So simple, but so cute.

Linking up to: Home Stories A to Z
No comments:
Post a Comment